Getting elevator planning right in new construction can mean the difference between seamless handover and months of costly delays. At Kaiser Elevator, we have seen first-hand how early attention to shaft dimensions, pits, overhead, and clearances not only protects project timelines but ensures performance and safety for decades to come. Our unique perspective—having engineered, installed, and maintained code-compliant packages across commercial towers, multifamily, hospitals, and more—shows that the checklist details are where long-term value is truly built.
Why Meticulous Elevator Planning Matters in New Construction
Elevators are rarely just another spec item—they are deeply integrated into a building’s structure and influence operations, fire egress, ADA accessibility, and value perception for tenants and visitors. A misaligned shaft or missing clearance can escalate costs and force redesigns. At Kaiser Elevator, we’ve helped clients avoid these headaches with a pragmatic, detail-driven approach rooted in code and constructability. With proper planning, you’ll not only stay compliant but create a positive ride experience and visually elevate your property.

Step 1: Begin with Site Assessment and Pre-Installation Coordination
Success starts on day one. Early engagement means our engineers can verify shaft placements, structural supports, and load capacity before walls are closed. Here’s how we approach kick-off:
- Understand project goals: Is the elevator for passengers, freight, or specialty use like car stackers in parking structures? This influences size, load, and features required.
- Walk the site with trades: Identifying deck openings, slab drops, and interference with mechanicals helps avoid costly cut-and-patch later.
- Confirm compliance: We always reference ASME A17.1, local fire, seismic, and ADA standards—especially critical in markets like New York and Boston.
- Integrate timelines: Aligning elevator delivery and installation with other core trades (steel, concrete, electrical) protects the schedule.
Step 2: Hoistway (Shaft) Engineering and Preparation
We prioritize making the shaft plumb, square, and sized exactly to specification. Even being off by half an inch can jeopardize your inspection or cause operational issues. Here are key checkpoints:
- Width and depth: Passenger elevators typically require a clear shaft width starting at 68 inches and depth at 54 inches. Freight and hospital cabs are custom-sized. We ensure alignment to within 1/4 inch over the full height.
- Openings: Door rough openings must match the cab’s configuration—usually 36 to 42 inches wide. We recommend verifying with laser levels before any drywall or jamb frames are set.
- No shared services: Only elevator-related pipes or conduits should run inside the shaft. Other trades must route utilities elsewhere to avoid interference.
- Attachment points: We specify where rail brackets and equipment must anchor, providing structural details for each landing and at the overhead slab.
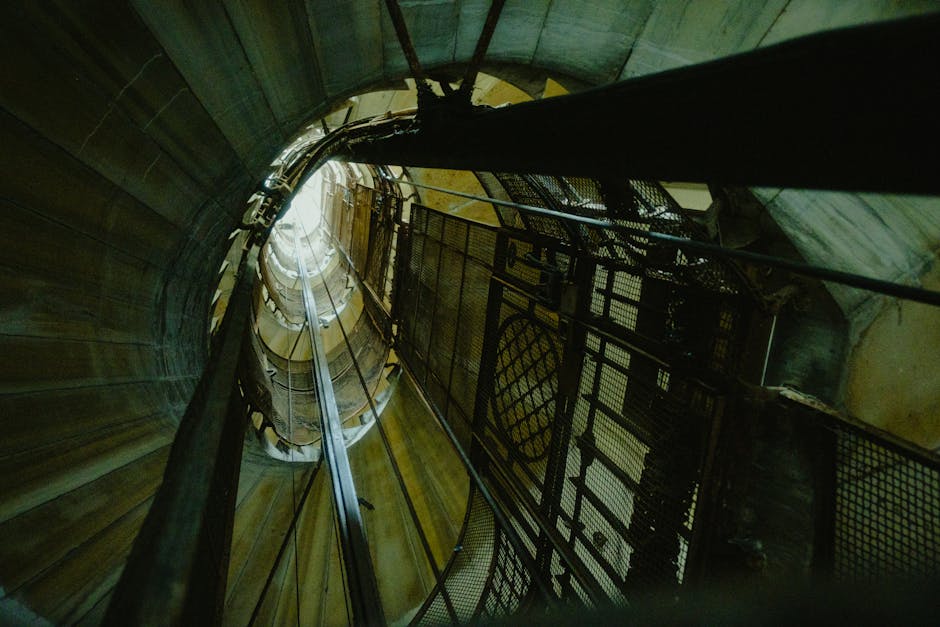
Step 3: Pit Construction—Depth, Drainage, and Safety Integration
Pits are easy to overlook but absolutely vital for system safety and code approval. Here’s what our teams focus on for every new build:
- Depth: For traction elevators, pits typically require a 48-inch minimum depth (deeper for high-travel designs). Residential applications can be shallower, but specs must always match device needs and code. We never compromise on pit plumbness.
- Water and drainage: Below-grade pits must be watertight and provide a designated location for a sump pump. This prevents moisture issues and code violations.
- Safety devices: Space must be included for buffers, electrical disconnects, stop switches, and any additional safety features. We wire interlocks and emergency communication per national and local guidelines.
- Access: Permanent ladders or platforms are placed per code. No storage is permitted in the pit space—this is strictly enforced at inspection.
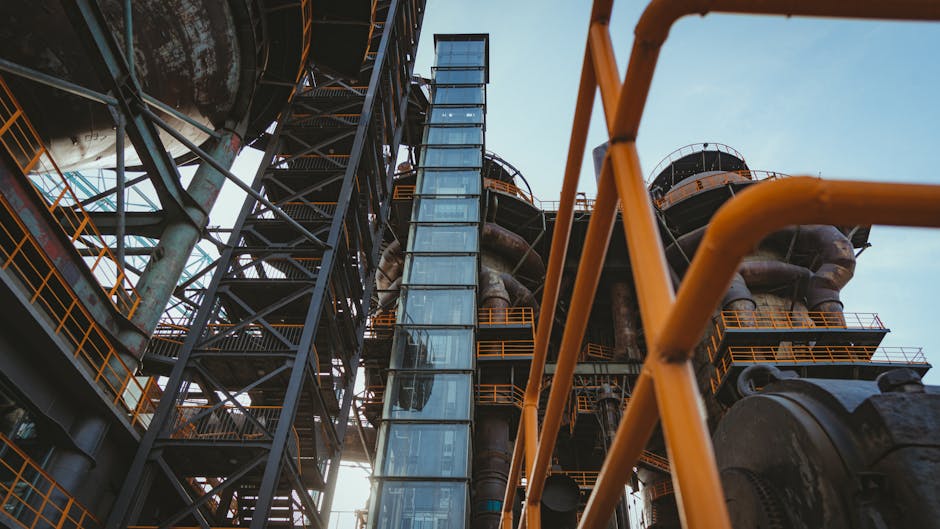
Step 4: Overhead Requirements and Machine Room Setup
The area above the top floor landing is crucial for safe elevator operation. Adequate overhead clearance ensures you have the space for moving equipment, sheave beams, and safety mechanisms. Our best practices include:
- Minimum heights: Traction systems typically need 12 to 14 feet of overhead clear. This impacts building roof elevations and mechanical layouts—an early coordination point with your structural team.
- Support beams and rail brackets: Structural engineers must provide beams and concrete pads to accept elevator equipment loads. We provide details in advance to prevent late field changes.
- Machine rooms: Only elevator equipment should be housed here. Ensure 220V or three-phase dedicated power, code-compliant grounding, ventilation, and fire-rated separation as required.
- Maintenance access: We require service paths, dedicated lighting, and clearance around all equipment for regular inspection and emergency interventions.
Step 5: Power, Controls, and Door Clearances
Bringing all the site elements together, this checklist ensures you don’t miss the final essentials before elevator installation begins:
- Power prep: A dedicated, energized panel (never shared with other equipment) must be live at least three days before install. We coordinate with your MEP team to confirm voltage and phase requirements are met.
- Wiring: Conduits for control cabling, communication systems, and fire alarm interfaces are roughed in before walls close. This keeps installation on track and ensures future maintainability.
- Door and cab clearances: Floor space at every landing must provide full access to landing doors, car controls, and ADA features such as 36-inch minimum approach zones, braille buttons, and handrail reach.
- Machine room security: Limited access signage and lockable doors protect both people and equipment.
Proven Tactics for Avoiding Expensive Mistakes
From our field experience, here are common problems we prevent with proactive coordination:
- Shaft off by more than 1/2 inch: We always recommend laser measurement before wall finishes. A small deviation can lead to expensive demolition and days of rework.
- Pit flooding or debris: Netting, temporary covers, and sump system installation are verified continually throughout construction to protect the pit and ensure inspections pass without surprises.
- Electrical not ready: Early and clear communication with electricians means we avoid waiting on final panel energizing—critical for Day 1 operation and inspection readiness.
Integrating Aesthetics with Performance: Not Just a Utility
With the technical bases covered, our clients often ask how to make elevators a design feature—whether with glass, stainless steel, or custom panels. At Kaiser Elevator, we provide a range of wall, ceiling, floor, and handrail options, working with architects to match the building’s style without sacrificing code or performance. This flexibility, paired with robust engineering, amplifies property value and tenant satisfaction.
Resources and Internal Guidance
We recommend reviewing region-specific considerations, such as those covered for Colorado’s high-altitude elevator planning or the seismic requirements outlined for Seattle metro projects. Every geography, from Boston to Houston, comes with unique compliance hurdles—our team is always ready to advise on specifics.
Final Thoughts: Set the Stage for Long-Term Success
Elevator planning in new construction isn’t just about ticking boxes—it’s about ensuring the backbone of your building’s vertical transportation supports safe, reliable, and aesthetically-pleasing movement for decades. At Kaiser Elevator, we’ve built our reputation on precision, compliance, and responsive service, helping developers, architects, and property managers realize their vision on time and on budget.
If you’re ready for spec-ready drawings, advice on unique project conditions, or simply want to verify your own elevator plans, reach out to us at kaiserelevator.com. Let’s elevate your next project with confidence.